Let`s chat about fairings / Call The Pros! (909) 808-4100

Motorcycle Fairings

Motorcycle fairings can be made from several different materials ranging from metals, plastics and fibreglass to newer composites such as carbon fibre. The importance of streamlining was known very early in the 20th century. Some streamlining was seen on racing motorcycles as early as the 1920s.

The term fairing came into use in aircraft aerodynamics with regard to smoothing airflow over a components where airflow was disrupted. Early streamlining was often unsuccessful resulting in instability. Handlebar fairings, such as those on Harley-Davidson Tourers, sometimes upset the balance of a motorcycle, causing instability. The introduction on the BMW R100RS in 1976 marked the beginning of widespread adoption of fairings on sports and touring types of motorcycles. Originally, motorcycle fairings were cowlings put around the front of the vehicle, increasing its frontal area. Gradually, over time they became an integral part of motorcycle design. Modern motorcycle fairings increase the frontal area at most by 5% compared to a naked machine. Fairings mostly carry headlights, instruments, and other items. If the fairing is mounted on the frame, mounting equipment on the fairing reduces the weight and inertia of the steering assembly, improving the handling.

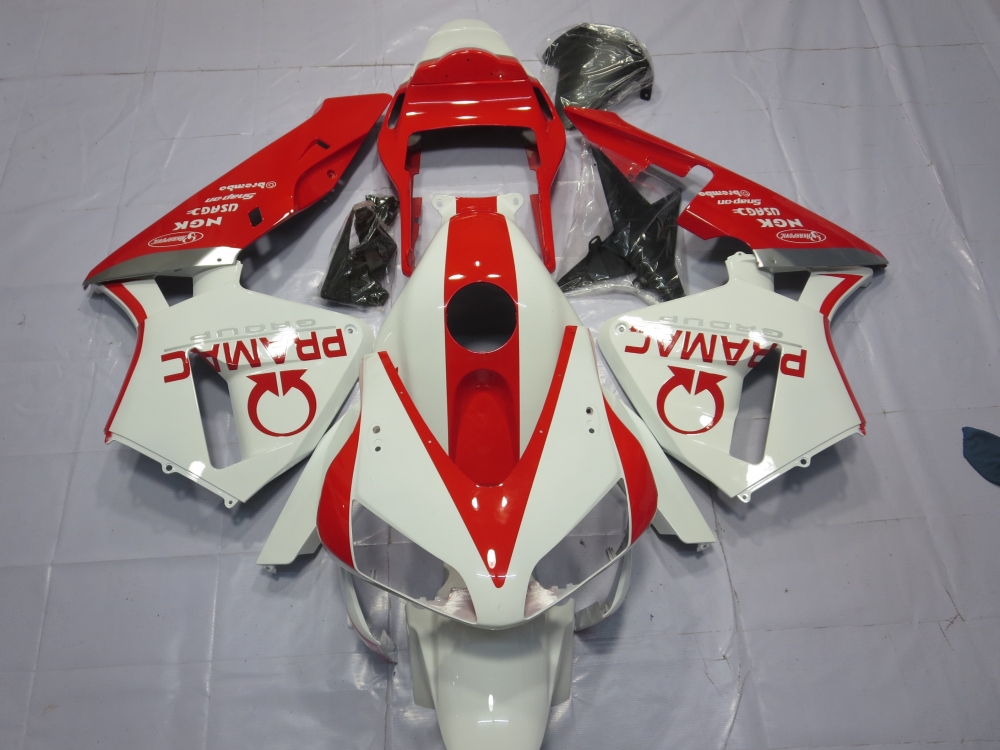
Over the years motorcycle fairings have changed in their composition over the years. Most motorcycle fairings are made from acrylonitrile butadiene styrene (ABS). ABS is a plastic commonly used in sport bikes and certain aftermarket fairing manufacturers due to its strong, flexible and light weight properties. The advantage of ABS over other plastics is that it combines strength and rigidity, while also being tough.

There are two common methods of producing an ABS plastic fairing: injection and compression moulding. During injection moulding, ABS plastic is melted and injected into the mould cavity. Constant pressure is applied to allow for material shrinkage. The plastic then cools and hardens in the mould. Injection moulds allows for uniform thickness throughout the entire piece. It gives the most accurate end product that can be produced uniformly every time. This is how we make our fairings at Monster Fairings, as it is the most reliable way to make strong and high quality parts. ABS can also be compression moulded. During compression moulding, the plastic is generally preheated and placed into a heated metal mould cavity and pressure is applied to force the plastic to take the shape of the mould. Heat and pressure is applied until the plastic cures in the mould. The excess plastic is then cut away and removed from the mould. Disadvantages to compression mould include varying product consistency and flashing, which is excess material attached to the moulded part that needs to be removed where two or more parts of the mould meet.

Another option to make motorcycle fairings is using composite materials such as fibreglass and carbon fibre. Fibreglass is made of woven glass fibres, and is used as a reinforcing agent for many plastic products. The composite is known as glass-reinforced plastic (GRP), is normally referred to by the name of its reinforcing material. Fibreglass fairings are commonly used on the race track. In most cases fibreglass is lighter, and more durable than ABS Plastic. Damaged fibreglass can be repaired by applying new layers of woven fibreglass cloth mixed with a polymer such as epoxy over the damaged area, followed by sanding and finishing.

Carbon fibre reinforced plastic (CFRP) is the lightest, but most expensive, fairing material available today. The fairings are made by exactly the same process as with GRP. However, the woven fibres are carbon instead of glass. Carbon fibre has a higher strength to weight ratio than GRP and is mostly used on the race track. Due to this, there is also a reduction in weight and size of fairings, as less material can be used to create fairings of the same strength as other fairings.

The Honda CBR 600 F4, the Last of a Generation

The Honda CBR600F4 launched in 1999 and was a complete redesign of the CBR600F3. It had an aluminium frame making it 14kg lighter. The list of changes is long: engine, carburettors, breaks, silencer, wheels, immobiliser, headlight and fairings. This makes it much faster than the F3. 

The F4 was the last bike from the CBR family to be carbureted, making it the last of it’s generation. The F4’s upgrades made the bike a lot faster. So much faster that the words, “Dedicated to Super Evaluators Dirk Vandenberg and Josef Boyd”, are embossed in raised letters on the inside of the Honda CBR600F4’s fairings. This dedication was made because two of Honda Research & Development’s senior product developers were killed during the final testing of this model.

The updates seen in the 1999/2000 CBR600F4 saw a noticeably different ride to the F3 and a major upgrade from the F3. The updated CBR 600 F4 was a very comfortable bike, the suspension has a great balance for the road. It is hard enough to enable the bike to be ridden vigorously, but soft enough to enable a smooth, comfortable ride. The GSX-R 600 would be able to out corner the F4, but the GSX-R is a more focused machine and requires a more experienced hand. However, F4 is good for inexperienced and relaxed riders, where the GSX-R is more aimed towards the more crazy riders that get their knee down at any opportunity.

With a top speed of 160mph it can still compete with the fastest of bikes. This bike is still heavy compared to the current bikes, but obviously with the massive change in materials available over the last 20 years bikes are now lighter and easier to throw around on the track. Compared to a 600 RR this bike is very heavy, but when you know how to control it, there is still a lot of fun to be had with the F4. The carburettors on the F4 are smooth, enabling it to easily be controlled on one wheel. The CBR600F4 fairings were updated to make the fuel tank slightly larger and put it up to 18l. This enables the bike to be ridden for around 200km without the need for a fill up.

Like the F3 the F4 is pretty much bombproof, even after 15 years. Still going strong after around 150,000 miles with electrical system being very reliable and the gearbox having no troubles. The problems with the chain after 30-40,000 miles on the F3 were addressed and as usual with regular oil changes and keeping the revs away from the red line there should be no trouble with the rest of the bike.

The CBR600F4 built upon one of the best bikes of the 90s and made it even better. It was the last carbureted bike of the CBR range and was soon to be replaced with a fuel injected model to send the CBR range into the 21st century. The CBR600F4 was truly the last of a generation.

Removing, Replacing and Repairing R6 Fairings

Dealing with the R6 fairings can sometimes be a daunting task. Most fairings are made from a material called ABS (Acrylonitrile Butadiene Styrene). ABS is a thermoplastic, meaning it can be formed, and reformed with heat. ABS is most commonly known for its good shock resistance and easy repair due to its thermoplastic properties. This makes it an ideal material for motorcycle fairings.

Removal of the R6 fairings can be done quite easily, however, remember to make sure you know where each bolt goes, as it is easy to lose bolts in the process. 

Firstly, start by removing the four hex bolts on each side of the bike. Remember to put them in a safe place. The bolts on the fairings are all generally the same size. Start with the long ‘strip’ fairing on either size, using a Phillips head screwdriver, undo the plastic rivet holding them in place, this can be found around the middle of the strip on the inside. Once this is removed, push the fairings towards the front of the bike and they will come free.

To remove the lower fairings, ensure you disconnect the indicators (turn signal). There are four bolts to remove the lower fairings, two of which hold the fairing onto the bike; the other two hold the each side of the lower fairings together. Once these bolts are removed, there is also a plastic rivet just below the bolt by the front forks and towards the middle of the bike. These rivets can be removed by simply pushing in the centre with a screwdriver; it will then pop out.

To remove the R6 Motorcycle Fairings around the headlight, remove the hex bolts holding the cowls in place. Next, remove the inner panel round the headlights and yoke with a 4mm hex wrench. This is held in place by two hex bolts on each panel. This can then be removed. The upper panel can then be removed by unscrewing the bolts and plastic rivets like in the previous fairings. Be careful when removing this panel, as there is a clip towards the front of the bike, which must be unclipped before this panel can be removed. Then remove the windscreen by undoing the four fastening bolts on the front of the windscreen. Then remove the mirrors, these are held in place by two bolts. The plastic rivet next to the mirrors can then be removed with a Phillips head screwdriver. After this the windscreen can be removed. The electrical cables to the headlights will then need to be disconnected, some are held in place by screws. There is then two screws either side, which are attached to the same panel as the speedometer. The headlights and cowls can then be removed.

The final step is to remove the tail fairings, remove the pillion and rider seat using the key and a hex bolt. The middle panel is then held in place with two pull pins, using a flat head screwdriver, pry these up and pull them out. Then undo the hex bolt in the middle towards the rear and the panel will lift out.  To remove the side panels, remove the allen bolts from underneath and the four push pins on the top, and two on the bottom. This piece can then be lifted off. To remove the lower part, remove the Phillips head screws, then the hex bolts holding it in place. The seat lock will then need to be removed, removing the pin on the right of the lock does this, and then the two hex bolts on the left. Remember there is two washers with these bolts that MUST be replaced. Loosening the cable, clip and lifting the plate up can then remove the seat lock. The lock will then fall through the fairings and out. The electrical connections then must be disconnected to enable the removal of the fairings. Lift the battery tray to remove the four 10mm bolts to release the light assembly. There is then two Phillips head rivets, that can be removed as before. Lastly remove the pillion pegs to remove the final lower fairing. 

Voila! To reinstall your fairings, follow this guide in reverse!

The Honda CBR 600 F4, the Last of a Generation

The Honda CBR600F4 launched in 1999 and was a complete redesign of the CBR600F3. It had an aluminium frame making it 14kg lighter. The list of changes is long: engine, carburettors, breaks, silencer, wheels, immobiliser, headlight and fairings. This makes it much faster than the F3. 

The F4 was the last bike from the CBR family to be carbureted, making it the last of it’s generation. The F4’s upgrades made the bike a lot faster. So much faster that the words, “Dedicated to Super Evaluators Dirk Vandenberg and Josef Boyd”, are embossed in raised letters on the inside of the Honda CBR600F4’s fairings. This dedication was made because two of Honda Research & Development’s senior product developers were killed during the final testing of this model.

The updates seen in the 1999/2000 CBR600F4 saw a noticeably different ride to the F3 and a major upgrade from the F3. The updated CBR 600 F4 was a very comfortable bike, the suspension has a great balance for the road. It is hard enough to enable the bike to be ridden vigorously, but soft enough to enable a smooth, comfortable ride. The GSX-R 600 would be able to out corner the F4, but the GSX-R is a more focused machine and requires a more experienced hand. However, F4 is good for inexperienced and relaxed riders, where the GSX-R is more aimed towards the more crazy riders that get their knee down at any opportunity.

With a top speed of 160mph it can still compete with the fastest of bikes. This bike is still heavy compared to the current bikes, but obviously with the massive change in materials available over the last 20 years bikes are now lighter and easier to throw around on the track. Compared to a 600 RR this bike is very heavy, but when you know how to control it, there is still a lot of fun to be had with the F4. The carburettors on the F4 are smooth, enabling it to easily be controlled on one wheel. The CBR600F4 fairings were updated to make the fuel tank slightly larger and put it up to 18l. This enables the bike to be ridden for around 200km without the need for a fill up.

Like the F3 the F4 is pretty much bombproof, even after 15 years. Still going strong after around 150,000 miles with electrical system being very reliable and the gearbox having no troubles. The problems with the chain after 30-40,000 miles on the F3 were addressed and as usual with regular oil changes and keeping the revs away from the red line there should be no trouble with the rest of the bike.

The CBR600F4 built upon one of the best bikes of the 90s and made it even better. It was the last carbureted bike of the CBR range and was soon to be replaced with a fuel injected model to send the CBR range into the 21st century. The CBR600F4 was truly the last of a generation.

Some of the best CBR Fairings and Body kits

The latest lineup from Honda has some interesting additions. The usual CBR range has not changed much. With updated colours amongst the standard Repsol race rep and the white, red and blue, there are also some different things to look at.

CBR fairings haven’t really changed much over the years, and the latest bikes are not that different. With most bikes available in the standard Repsol orange, white, red and blue. However, there are also some other styles available, that may catch your eye if you don’t want to follow the herd.

My personal favourite it the Konica Minolta race rep, with similar colours to the latest limited edition CBR600RR, blue wheels and a white and black fairing kit is the majority of this look. This is very different from what you normally see on a Honda and in my opinion is one of the best options to go for if you’re looking at changing the colour of your bike. The advantage of this is also the contrasting colours and the white in the paint work also making you more visible on the road which is always a positive.

My next favourite is the white and black CBRs, with just a hint of red they make mean machines and stand out in any crowd. They look modern, which is sometimes hard for Honda as they seem to be using the same paint as they were when they introduced the CBR back in 1992.

If you really want to make your bike standout, consider maybe going for something different entirely. The navy blue and black Honda’s are very nice, and yes the colours are similar to the latest range from Yamaha, but to be honest unless you look at getting a one off custom paint job, you will always find a bike that has similar colours. But that’s not the point. If you want to make peoples heads turn, make your bike different, don’t go for standard Repsol colours, in my opinion go for a plain one colour bike, then get some accents of another colour thrown in there, for example black and orange or black and red.

You also have the opportunity to make your older CBR look new. Look into the fixings available so that you can fit new style fairings on your older bike or even the other way around. This will definitely turn heads.

The latest bike from Honda is also worth mentioning, the NM4 Vultus. To be honest it looks like something Batman would ride, with it’s square matt black fairings against its shiny metal parts make it one to look at. With what Honda claims to be “jet fighter styling” the bike envelopes the rider “in a cocoon of aerodynamic angles inspired by Japanese Manga comics”. This 750cc monster even comes with a digital display that changes depending on what gear you’re in. With white, pink, blue and red as standard, and the option to adjust it to another 25 other colours. This bike is truly from another planet and will be interesting to see in person.